Last updated: June 29, 2026
Any links on this page that lead to products on Amazon are affiliate links and I earn a commission if you make a purchase. Thanks in advance – I really appreciate it!
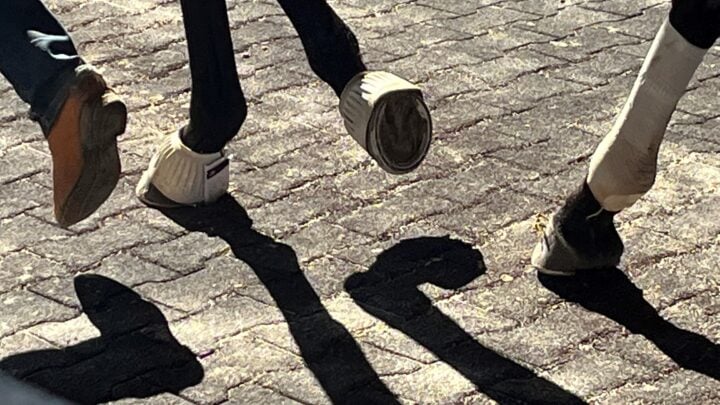
Bell boots aren’t standard equipment — they’re protection for horses that actually need it.
They prevent overreach injuries where the hind hoof strikes the front heel bulbs or coronary band — pulled shoes, soft tissue damage, and chronic heel irritation in horses that move fast, wear shoes, or lose coordination under fatigue.
If a horse has a clean history with no interference, boots are often unnecessary and can create heat and moisture problems if overused. But once a horse has pulled a shoe, shows overreach marks, or is in high-intensity work, bell boots are one of the simplest and most cost-effective protections available. Use them when risk is present — not by default.
Do horses need bell boots? It depends on documented risk, not habit. Young Thoroughbreds in speed training, horses wearing aluminum racing plates or corrective shoeing, and horses with a history of overreach or pulled shoes need them. Horses with clean movement and no interference history generally don’t — and routine use on horses that don’t need protection adds heat, moisture, and maintenance without benefit.
Use bell boots if your horse: overreaches, wears expensive shoes, is young and still developing coordination, or shows heel bulb marks after turnout.
Skip them if your horse: moves cleanly, has no interference history, and is in low-intensity work with no documented overreach pattern.
Table of Contents
What Are Bell Boots for Horses?
Bell boots — also called overreach boots — are protective rubber or synthetic coverings worn around a horse’s pastern and heel area. Their primary job is to prevent the hind hooves from striking the front heel bulbs and coronary band during movement, a condition called overreaching. Secondary uses include protecting expensive therapeutic and corrective shoeing from being pulled off during turnout and speed work, and providing heel coverage during trailer shipping.
When to Use Bell Boots: The Decision Framework
Not every horse needs bell boots. I learned this the expensive way after outfitting an entire barn and then dealing with thrush outbreaks in horses that never overreached in the first place. The framework is simple: boot horses with documented risk, do not boot horses without it. The American Association of Equine Practitioners reinforces this principle: protective equipment should address a documented need, not serve as routine gear.
| Horse Type | Risk Level | Best Boot Style | When to Use |
|---|---|---|---|
| Young TB in training | High | Pull-on rubber | All turnout and speed work |
| Barrel / performance QH | Medium-High | Double-thick rubber | Competition and pasture turnout |
| Horse with corrective shoes | Medium | Pull-on | Turnout always — protect the shoeing investment |
| Green trail horse | Medium | Velcro | Rocky terrain and initial training period |
| Experienced trail horse | Low | Situational only | Long or technical rides; fatigue increases risk |
| Barefoot pasture horse | Low | None typically needed | Only if chronic overreach is documented |
3 Bell Boot Rules
- Chronic overreachers get boots, period. If your horse has pulled a shoe twice or shows coronary band damage — boot it. The risk calculus is clear.
- Protect the shoes, not just the hooves. Aluminum racing plates and therapeutic shoeing are expensive — a $30 boot is cheap insurance against a $200 farrier visit.
- Turnout trumps riding. Horses play harder in a pasture than under saddle. If they are going out with the herd, they are booting up — no exceptions.
Thoroughbreds vs. Quarter Horses: How Movement Changes the Risk
Thoroughbreds — especially young ones in active training — have long, reaching strides. That extended front leg combined with a driving hind end creates overreach potential, particularly when they are fresh or on speed work days. I keep pull-on boots on my Fair Grounds string nearly year-round without exception.
Quarter Horses have shorter, more collected strides and are less likely to overreach during normal work. But when they do — coming out of a barrel turn or during a hard sliding stop — the contact can be severe because of the raw power from their hindquarters. My barrel horse riders boot for competition and pasture, not for daily arena schooling unless the horse has a documented overreach history. Horses with long pasterns or a naturally downhill build are also more prone to overreaching regardless of breed — conformation matters as much as discipline when making this call.
Louisiana Mud vs. Dry Climates
Louisiana red clay mud sticks like cement. When bell boots fill with that wet, heavy clay, they become hoof-shaped mud weights that can cause the problems they are meant to prevent. My protocol during wet months is to scrub pull-on rubber boots daily — not just rinse them — and keep two sets per horse in rotation so one is always drying while the other is in service.
In dry climates like Texas or Arizona, the problem is the opposite: fine arena dust builds up inside the boot cup and creates an abrasive surface against the pastern skin. Whether your environment is wet or dry, inspect the interior of every boot before you put it on.
| Material | Primary Benefit | Field Notes |
|---|---|---|
| Gum Rubber | Heavy-duty durability; stays in deep mud; resists being pulled off | The gold standard for turnout. Soak in warm water 5 minutes before application to ease it over the hoof. |
| Neoprene | Soft, flexible, and cushioned; reduces rubs on sensitive pasterns | Best for arena work. Avoid for long-term turnout — holds moisture against the skin and promotes thrush in humid climates. |
| Ballistic Nylon / PVC | Lightweight, water-resistant, easiest to spray clean | Excellent for daily schooling. Sizing is critical — these have very little stretch so fit carefully. |
Pull-On vs Velcro Bell Boots: Quick Comparison
| Feature | Pull-On Rubber | Velcro / Ballistic Nylon |
|---|---|---|
| Best use | Turnout, mud, unsupervised 12-hour wear | Arena work, frequent daily on/off |
| Durability | 18–24 months with daily use | 8–16 months (less in mud) |
| Pasture safety | High — no tabs or catch points | Lower — Velcro tabs snag on fencing |
| Heat retention | Higher — rubber acts like a sweatband | Lower — nylon wicks and breathes |
| Ease of application | Harder — soak in warm water first | Very easy — single-hand application |
| Cost over 5 years | $75–$100 per horse | $200–$360 per horse (frequent replacement) |
Bell Boot Sizing: How to Measure Correctly
Measure the coronary band at its widest point — where the hoof wall meets the hairline, not at the base. Use a flexible tape measure with the hoof clean and dry; mud and winter hair add bulk that throws off the reading. For pull-on boots, add a quarter inch because they stretch over the hoof. When in doubt, size up for Velcro boots and size down for pull-ons.
| Boot Size | Coronary Circumference | Typical Horse | Notes |
|---|---|---|---|
| Small | 11–12 inches | Arabians, refined ponies | Rarely used for performance horses |
| Medium | 12–13 inches | Average TBs, stock QHs | Fits the majority of standard training barns |
| Large | 13–14 inches | Large TBs, Warmbloods | Size up if the horse has heavy winter feathering |
| X-Large | 14–15 inches | Draft crosses, large Warmbloods | Measure twice; check heel bulb depth for fit |
The boot should cover the heel bulbs completely and just touch the ground on a flat surface. Two fingers should fit snugly between the top of the boot and the pastern — tight enough to stay put but loose enough to avoid pressure that builds heat. Between sizes and worried about rubs? Go larger. A slightly loose boot wrapped with vet wrap if needed beats a tight boot creating pressure sores.
Four Barn Stories That Changed How I Use Bell Boots
Theory is straightforward: protect the front heels from hind hoof strikes. Reality is messier. These four situations either saved the day or taught me expensive lessons.
Story 1: The Fair Grounds Shoe-Pulling Disaster
Two-year-old filly, first serious breeze at Fair Grounds — five furlongs to see what speed she had. At the three-furlong pole she really opened up, and her right hind clipped her left front heel mid-stride — a textbook overreach injury. That aluminum racing plate popped off like a bottle cap. Vet bill: $450. Lost training time: three weeks during prime spring prep. Cost of bell boots that could have prevented it: $35.
Horseman’s Perspective — The Development Gap: Young horses develop stride length faster than coordination. Do not wait for a torn coronary band to realize they are hitting themselves. Boot them up before speed work, not after the first injury. A two-year-old TB in its first serious training period should be in pull-on rubber boots for every workout without exception.
Story 2: The Barrel Horse Turnout Injury
Experienced 1D barrel mare with impeccable arena form — never a problem under saddle. Monday morning: three-legged lame in the pasture. A perfect half-moon slice on the heel bulb, already abscessing. What happened? She and her pasture buddy got into some playing around in Louisiana mud. She caught herself during a hard pivot — something she would never do under saddle with a rider keeping her collected. That injury took four months to heal because of its location, constant movement, and constant moisture. She missed her entire fall season.
Horseman’s Perspective — Turnout Intensity: Horses play harder in turnout than they do under saddle. Performance horses with big motors often overreach during a pasture gallop even if they move perfectly while working. High-risk horses should wear double-thick pull-ons every time they go out. If you would not let them gallop barefoot at competition speed, do not let them go out barefoot in turnout either.
Story 3: The Trail Ride Debate with My Grandson
Last summer my 14-year-old grandson wanted to take his gelding on a three-day trail camping trip through Bogue Chitto State Park. I said boots. He said his 12-year-old Quarter Horse had done fifty trail rides without overreaching once and boots were just extra weight. The kid had a point — this horse moved like a western pleasure horse, short and flat, perfect cadence. But I told him: rocky trails, creek crossings, three days of riding. That horse is going to get tired. Tired horses make sloppy steps. Do you want to gamble on whether his hind catches his front when he is exhausted on day three? He wore the boots. Nothing happened — which is exactly the point.
Horseman’s Perspective — Risk Isn’t Static: Bell boots on experienced horses with clean movement are often unnecessary for normal riding. But risk changes with fatigue, challenging terrain, and duration. When variables shift — multi-day trips, rocky footing, horses working harder and longer than usual — boot even your most reliable horses. The cost of a boot is nothing compared to the cost of a heel bulb laceration on day three of a trail trip.
Story 4: The Velcro Failure and the Math That Changed My Mind
For years I was a Velcro evangelist — easy on, easy off, adjustable. Then I tracked replacement costs and realized I was buying new Velcro boots every eight to ten weeks during wet season. Louisiana mud packed into the Velcro, killed the grip, and suddenly boots were spinning around pasterns or falling off. Meanwhile, the pull-on rubber boots I had been avoiding? Two full seasons of daily use. My current protocol is Velcro for arena work where I am on and off frequently, and pull-on rubber for turnout — where it has to survive mud, play, and 12-hour stretches without supervision.
Top 5 Bell Boots I Trust and Use Daily
Editor’s Picks — Two boots I use most often:

Tough-1 Heavy Duty Open Bell Boot
My default turnout boot for the Fair Grounds string — stays on in mud, doesn’t twist, holds up through 12-hour pasture stretches without adjustment. Heavy rubber, 18–24 months durability.
View on Amazon
HORZE Pro Bell Boots — Neoprene
What I reach for when a horse has been rubbing in standard rubber — soft neoprene with enough protection for arena work and light turnout. Good choice for sensitive-skinned horses.
View on AmazonIf your horse falls into the “use boots” category, choosing the right type matters. A boot that can’t stay on in wet conditions, survive turnout, and avoid rubbing isn’t worth buying at any price. These five have proven themselves in real barn conditions. All Amazon links are affiliate links — I earn a small commission at no cost to you.
Quick pick: If you just want the safest turnout option, go with a pull-on rubber boot.
| Product | Material | Durability | Best Use | Price Est. | What I Use It For |
|---|---|---|---|---|---|
| Tough-1 Rubber Pull-On | Heavy rubber | 18–24 months | Daily turnout, mud, wet conditions | $15–25 | My default turnout boot — stays on in mud, doesn’t twist, holds up through long pasture hours without adjustment |
| Professional’s Choice Velcro | Ballistic nylon | 12–16 months | Arena work, daily use, multiple on/off | $35–50 | What I reach for when booting multiple horses in a row — quick on and off, reliable for arena work |
| Weaver Double-Thick | Dual-layer rubber | 24–30 months | Chronic overreachers, heavy mud turnout | $30–45 | For horses that consistently overreach or pull shoes — extra thickness makes a real difference in wet turnout |
| Classic Equine No-Turn | Ribbed rubber | 16–20 months | Horses that spin conventional boots on round hooves | $25–35 | Useful for horses that shift regular boots — the no-turn design keeps protection where it belongs |
| Horze Neoprene | Durable neoprene | 14–18 months | Rub-sensitive horses, arena work | $20–30 | Good for horses that rub in traditional rubber — softer material with enough protection for riding and light turnout |
How to choose the right bell boot fast:
- Turnout or mud? Pull-on rubber — stays put, survives wet conditions, no tabs to catch on fencing.
- Daily riding with frequent on/off? Velcro or ballistic nylon for convenience and breathability.
- Horse consistently pulls shoes or overreaches? Double-thick rubber — durability matters more than anything else.
- Horse gets rubs in standard rubber? Neoprene or soft-lined boots — protection without the irritation.
Bottom line: Buy based on how your horse actually lives — not how the product looks on a shelf.
Pros and Cons of Bell Boots
| Pros | Cons |
|---|---|
| Prevent overreach injuries and coronary band lacerations | Trap heat and moisture — especially rubber in summer |
| Protect expensive therapeutic and corrective shoeing | Can cause coronary band rubs if poorly fitted or left on too long |
| Reduce injury risk during unsupervised turnout | Require daily inspection, cleaning, and rotation |
| Inexpensive insurance against costly vet bills | Not necessary for every horse — prolonged use in humid conditions or poor hygiene can promote thrush |
| Available in materials suited to any discipline or climate | Velcro styles catch on fencing and degrade in mud |
Bell Boot Mistakes That Cost Me Money
Most Common Bell Boot Mistakes — Avoid These Before Anything Else:
- Leaving boots on 24/7 in humid climates — creates the thrush conditions boots are supposed to prevent
- Using Velcro boots for unsupervised turnout — tabs catch on fencing and cause panic injuries
- Ignoring early coronary band rubs — a dime-sized raw spot caught on day three avoids a vet call on day fourteen
- Booting horses that do not need protection — routine boots on clean-gaited horses add daily heat stress without benefit
Mistake 1: Over-Booting Barefoot Horses
A client had a barefoot trail horse with solid hooves, good wear, perfect form, and no overreach in five years. A clinic trainer told her all horses need bell boots for turnout. She bought a pair and left them on 24/7. Six weeks later: thrush in both front hooves. The dark, damp environment under solid rubber in Louisiana humidity created perfect bacterial conditions. Barefoot hooves that had been rock-solid now needed daily thrush treatment and two months to recover.
Barefoot hooves need air circulation. Constant bell boot coverage in humid climates traps moisture and creates anaerobic conditions where thrush bacteria thrive. My rule: barefoot horses in bell boots get daily hoof checks and boots removed at least eight to ten hours per day for air circulation. If you cannot commit to that, reconsider whether the boots are necessary for this horse.
Mistake 2: Ignoring Coronary Band Rubs
This problem sneaks up on you. New boots seem fine — not tight, not loose, no obvious issues. Three weeks later the horse is slightly off. You see nothing obvious, but there is heat at the coronary band. You pull back the boot: a dime-sized raw spot where the edge has been rubbing every stride for weeks. I have seen these turn into full infections requiring antibiotics and weeks of stall rest — all because nobody caught the early signs during daily checks.
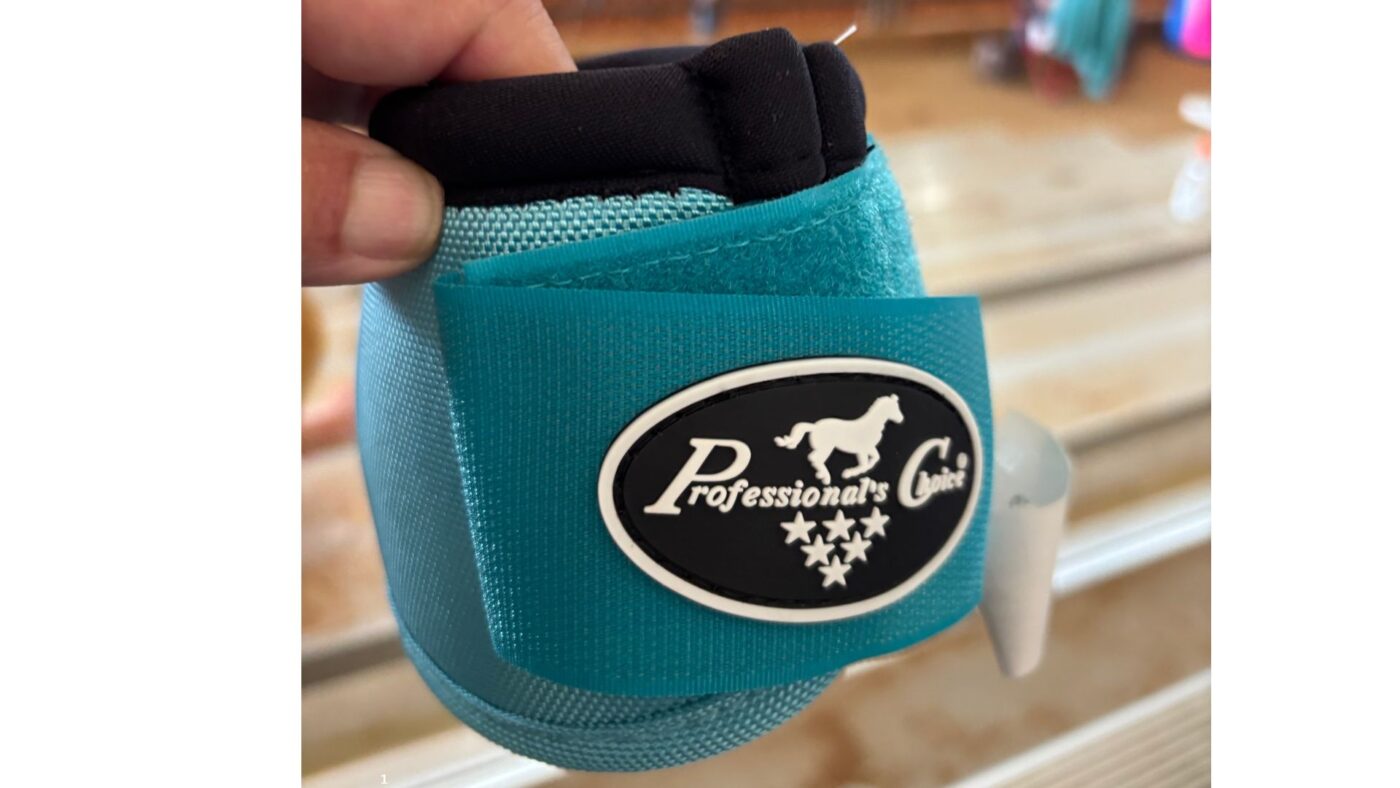
Not every boot purchase is about overreach risk: I picked up this pair from a vendor booth at a horse show in Mississippi for my granddaughter. Her horse didn’t need them — she wanted them because they matched her saddle blanket. Fair enough. Just don’t confuse “I want my gear to match” with “my horse needs protection.” They’re different decisions, and this article is about the second one.
Mistake 3: Velcro Boots for Unsupervised Turnout
Bell boots — especially Velcro types or poorly fitted ones — catch on fence wire, gate latches, and another horse’s hoof during pasture play. I have dealt with two cases where horses panicked after getting caught, thrashed trying to free themselves, and created injuries far worse than any overreach would have caused. The worst case: a young gelding caught his boot on a T-post cap, threw himself down in panic, and twisted his leg badly enough to require four months of rehabilitation. He had never overreached. The boots were on because the previous owner “always used them.” Use pull-on rubber for turnout, not Velcro. The tab is a catch point. Smooth rubber sitting flush against the hoof is not.
Mistake 4: Cheap Velcro in Mud
As the cost breakdown in Story 4 shows, cheap Velcro boots are a false economy — they fail under stress and force constant replacement, costing significantly more over time than a single quality set of pull-on rubber. Calculate cost per month of use, not purchase price.
When to Call the Vet — Red Flags That Cannot Wait:
- Persistent swelling at the coronary band lasting more than two hours after boot removal
- Concentrated heat in one specific area, indicating active inflammation rather than general warmth
- Open wounds at any boot contact area — these infect rapidly in barn environments
- Gait changes that appear with boots on and resolve when boots are removed
- Foul odor or discharge from under the boots, indicating thrush or bacterial infection
- Visible tissue changes in hoof wall color or texture at the coronary band from sustained pressure
Do not wait to see if it gets better. Coronary band damage escalates fast. A $150 vet call today beats a $1,500 treatment plan next month.
How to Clean and Maintain Bell Boots
Boot maintenance is where most riders cut corners — and where boots fail early. Properly maintained rubber boots last two full seasons. Neglected boots fail in three months.
30-Second Boot Diagnostic — Run This Every Day Before Booting:
- Check for heat: Run your hand around the coronary band. Localized heat means the fit is too tight or the boot has been on too long.
- Check for rubs: Look for hair rubbed away or skin that appears weeping or raw. Any rub means stop use until you resolve the fit problem.
- Check for moisture: Is the hoof wall soft or spongy? The boot has been on too long. Remove it, dry the hoof, and give it air time before the next session.
- Check the boot interior: Flip the boot and look for grit, debris, and any cracking or rough edges. A rough interior is sandpaper against the pastern.
Cleaning by Boot Type
Rubber pull-ons: Hose off after every use and scrub the interior with a stiff brush during wet months — do not just rinse. Mud packs into the cup and becomes an abrasive. Store away from direct sunlight; UV exposure breaks down rubber faster than wear does. Keep two sets per horse in rotation so one is always drying while the other is in use.
Velcro and ballistic nylon: Remove dried mud from the hook-and-loop fasteners with a stiff brush before any mud has a chance to set. Soaking in a bucket with a drop of disinfectant once a week kills the bacteria that builds up in the fabric against the pastern. Once the Velcro grip becomes noticeably weaker, replace the boots — degraded Velcro allows the boot to shift and rotate, creating exactly the abrasion you bought the boot to prevent.
The rotation rule: In wet climates, always have a minimum of two sets per horse. A boot that goes back on a damp hoof after a rainy turnout is a thrush factory. One set drying, one set in service.
My Real-World Bell Boot Protocol
This is the protocol built from managing horses in Louisiana — through Delta Downs racing, Fair Grounds training, and barn operations at our Folsom facility — that prevents injuries without creating new problems.
Young TBs in training: Pull-on rubber for all turnout and any work faster than a jog. No exceptions. An unbooted two-year-old in speed work is a risk not worth taking.
Performance Quarter Horses: Boots for competition and pasture. Not daily arena work unless the horse has shown overreach tendency. Boot for the risk profile, not the discipline.
Experienced trail and lesson horses with clean movement: No automatic boots. Assess terrain, duration, and conditions. A three-day rocky ride with a tired horse at the end? Boot them. A neighborhood afternoon trail on familiar ground? Probably not.
Any horse with corrective or therapeutic shoeing: Boots as shoe protection. A $200 farrier job justifies $35 in pull-on rubber without any debate.
Barefoot horses: Boots only during verified high-risk activities, removed within four to six hours maximum. No 24/7 use. See the thrush guide if you are already seeing softening or odor under the boot.
All boots: Daily inspection for fit, cleanliness, and wear. All hooves checked for heat and rubs before and after. This protocol has caught problems early dozens of times.

Bell Boots for Horses: Frequently Asked Questions
Do all horses need bell boots?
No. Only horses that overreach, wear expensive shoes that would be costly to replace, or are young and still developing coordination truly need bell boots consistently. Experienced horses with clean movement and barefoot horses with no injury history often go better without them. In humid climates especially, boots trap heat and moisture — and daily exposure without a specific protection reason creates a slow hoof health risk that accumulates over time, particularly in barefoot horses or horses in wet conditions.
What are bell boots for horses used for?
Bell boots protect the front heel bulbs and coronary band from being struck by the hind hooves during movement — a condition called overreaching. They are also used to protect expensive therapeutic or corrective shoeing from being pulled off during turnout and speed work. Secondary uses include providing some heel protection on rough or rocky terrain and during trailer shipping.
Pull-on vs Velcro bell boots — which is better?
Pull-on rubber boots are best for turnout and wet conditions. They stay in place through 12-hour turnout, last 18 to 24 months, cannot be caught on fencing or pulled off by another horse, and resist mud and moisture better than any other style. Velcro boots are best for controlled arena work where you apply and remove them multiple times daily. In wet climates, Velcro is a poor choice for turnout in most barn environments. Mud destroys the fasteners within weeks and the tabs catch on fencing.
How do I measure my horse for bell boots?
Use a flexible tape measure around the coronary band at its widest point — where the hoof wall meets the hairline, not at the base of the hoof. Measure with the hoof clean and dry. For pull-on boots, add a quarter inch because they stretch over the hoof. The boot should cover the heel bulbs completely and just touch the ground. Two fingers should fit between the top of the boot and the pastern. When between sizes, size up for Velcro and down for pull-on.
Can I leave bell boots on my horse 24/7?
It is not recommended. Constant boot coverage traps moisture and creates anaerobic conditions where thrush bacteria thrive — particularly in humid climates like Louisiana. If boots are necessary for high-risk horses, remove them for at least 8 to 10 hours daily to allow hooves to dry and breathe. Any foul odor, discharge, or persistent heat under the boots after removal is a signal to stop use and call the vet.
Do bell boots prevent pulled shoes?
Yes. Bell boots are one of the most effective ways to prevent horses from stepping on and pulling off front shoes during turnout and training. This is particularly important for horses wearing aluminum racing plates, therapeutic bar shoes, or corrective shoeing where replacement cost is significant. A $30 bell boot protecting a $200 farrier job is straightforward cost-benefit math.
How tight should bell boots fit?
The boot should fit snugly enough that it cannot rotate or slip down during movement, but loose enough that two fingers fit between the top of the boot and the pastern. Too tight creates pressure and heat buildup that damages the coronary band. Too loose allows footing and debris to pack inside the boot and creates an abrasive surface against the pastern skin. Check the fit during a trot test after first application.
What if my horse hates wearing bell boots?
Most horses resist bell boots for one of two reasons: poor fit creating pressure or rubbing, or trapped debris creating discomfort. Start by cleaning the hoof and pastern thoroughly before application and checking for any heat or rubs from previous use. Introduce new boots gradually during grooming before using them for riding. If a horse continues to resist aggressively after several days, reassess whether the boots are necessary.
Are bell boots safe for pasture turnout?
Pull-on rubber boots are safe for turnout when properly fitted. Velcro boots are not recommended for unsupervised turnout — the tabs catch on fencing, gate latches, and other horses’ hooves, and a panicked horse that cannot free itself from a caught boot can create injuries far worse than any overreach. Use smooth pull-on rubber for pasture, Velcro for arena. Inspect pasture fencing for T-post caps, wire ends, and metal fixtures at hoof height before turning out any horse in boots.
How long do bell boots last?
Pull-on rubber boots last 18 to 24 months with daily use. Double-thick rubber can last 24 to 30 months. Velcro boots last 12 to 16 months in dry conditions but degrade significantly faster in mud and wet environments. Neoprene boots typically last 14 to 18 months. Inspect all boots monthly for cracks in the rubber, torn edges, and Velcro that has lost its grip. A boot that has lost structural integrity provides no meaningful protection and should be replaced.
Key Takeaways: Bell Boots for Horses
- Boot for documented risk, not habit — clean-gaited horses without injury history often go better bare; routine booting without reason creates heat and moisture problems
- Pull-on rubber for turnout, Velcro for arena — match the boot style to the environment; Velcro fails in mud and catches on fencing
- Young TBs generally need boots for speed work — stride length develops faster than coordination, and waiting for the first coronary band injury is a costly way to learn this
- Protect the shoes as much as the hooves — any horse in therapeutic or corrective shoeing should be booted for turnout automatically
- Barefoot horses need air circulation — do not use boots 24/7 on barefoot horses in humid climates; thrush develops fast under constant rubber coverage
- Fit matters more than brand — two fingers between the boot top and the pastern, heel bulbs fully covered, boot just touching the ground on a flat surface
- Check every single day — heat, rubs, and early infection caught in the first 24 hours save weeks of stall rest

About Miles Henry
Racehorse Owner & Author | 30+ Years in Thoroughbred Racing
Miles Henry (legal name: William Bradley) is a professional horseman based in Folsom, Louisiana. He holds Louisiana Racing License #67012 and has spent over three decades managing Thoroughbreds at premier tracks including Fair Grounds, Delta Downs, and Evangeline Downs.
Expertise & Hands-On Experience: Beyond the track, Miles has decades of experience in specialized equine care, covering everything from hoof health and nutrition to training protocols for Quarter Horses, Friesians, and Paints. Every guide on Horse Racing Sense is rooted in this “boots-on-the-ground” perspective.
30 of their last 90 starts
Equibase Profile.
Connect with Miles: